If you have never heard of a Gelli Plate, you may want to start HERE over at the Gelli Arts Website. They are the creators of the Gelli Plate and have a lot of information there. I wish I could remember where I first saw one, but I knew right away that it looked very cool, so I did a little research and ordered my first small 6" one from Amazon. A short time later, I was thrilled to find them now being carried, at Absolutely Everything and that's when I also learned that Kate, our store owner, was going to be teaching a techniques class soon, to introduce us to the cool new printing plates. Then as things go, I kind of forget about it, until I was at card club on Tuesday and realized the class was on that same week, so I quickly signed up and took that class on Thursday.

I had also watched some videos on You Tube, so I knew the basic concept was to create "mono-prints" and that you kind of use the "Gelli Plate" as your canvas. It think it's very on trend now, especially for those who love Mixed Media projects and do journaling. I knew right away that I would like the prints to use as card background or as elements for cards that I could cut by hand or even die cut. And when it comes to new things in card-making, I'm always happy to try out something new!
We did learn that the paints that seem to work the very best with the Gelli Plates are Acrylic paints and it's even better if the paints you use tend to be a bit of the slow dying side, as that gives you more time for each print and "ghost" print. Each time you cover your plate with paint, using a brayer, you will generally be able to get 2-3 prints and you can also add or change colors and anytime. We started by simply using copy/typing paper, a good idea while learning, but once you are good and can make great prints, they'll look best on some nice Mixed Media paper or even nice quality smooth cardstock. In class, I brought along the only acrylic paints I had which were two bottles of Golden paints and a large selection of Ranger Distress Paints, which worked well, but are more watery than the Golden paints. The metallic colors are a great add in and use also use a huge variety of stencils. We also learned that Nija Spash Inks are awesome to use in Gelli printing and I picked up my first set, that day! There is so much more that you can do to create a variety of textures and designs and they will be teaching more classes at the store. This was a nice basic class, to learn how to use the plate, print, re-print and also how to clean our plates and store them. We printed several prints in class and today I made a new card using one of my favorites. This one was printed onto some black cardstock, which is also another great idea. I loved how the gold and teals mixed in and it turned out to be one of my favorites.
This card and the colors are so much prettier in person and the gold die cuts, are also super shiny and bright and really pop off the background, which I really love. I also love how adding the separate layers of pain and then using the stencils, also add such a fun texture to the cards. This particular print was done on some very basic black cardstock, nothing fancy and nothing expensive.

I am submitting my "Enjoy" card to each of these fun challenges. I hope I can encourage you to play along!
- Addicted to CAS - Challenge # 39 - Texture
- Hiding in my Craftroom - Challenge # 151 - Freestyle
- Through the Craftroom Door - Anything Goes
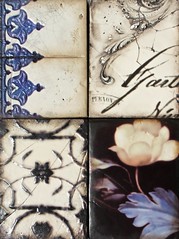
Here are some additional photos of a sampling of the other prints I complete in class on Thursday. Once you get going, you can really create a LOT of prints in a fairly short amount of time.


I forgot to mention that you can also print on both the front and back, at least while in the learning process and also print onto patterned paper. You can mix several colors or use only one of two colors and then add second, third and even MORE layers at another time. I could take all these and add more texture and color them each page. The possibilities are really endless and that's the fun part!! I also made a birthday card with one of my backgrounds, but forget to take a photo before I mailed it It was a male card, so I chose a background that had red, black and some blue, all on white and then I cut a black banner for the front and added my Birthday Sentiment. It was all placed on a Black card base and was pretty cool!!
As you can guess, I think this is something that I'm going to really enjoy using and although we did receive a starter size plate in class, I'm very happy that I already had a larger one and if I really start to love this, I'm going to purchase the newest Round plate, along with more paints and some really cool "Texture Tool", I saw in one of the You Tube videos. My LSS is also going to do a whole series of Gelli Printing classes, using are variety of papers and paints, along with a cool array of tools/elements that you can use to make really creative designs in your prints. You can bet I'll be taking these and I am already looking forward to the inspiration.
I have one more card that I have now completed to share too and this one is for the new challenge over at CASology where the current Cue is Bee!!

As soon as I saw this theme, I immediately have few ideas, based on some things I have in my stash. I new I had a "Bee" embossing folder by Elizabeth Crafts, as well as a Die Cut Bee by Memory Box, and at first, I thought I would use one of those, but then I remembered I also has this adorable stamp set, "Circle Friends", which is another of the Simon Says Exclusive that was designed by Kristina Werner.

I am also submitting this card to the current "Wednesday Challenge" over at Simon Says Stamp, where the theme for this week is "Anything Goes"!

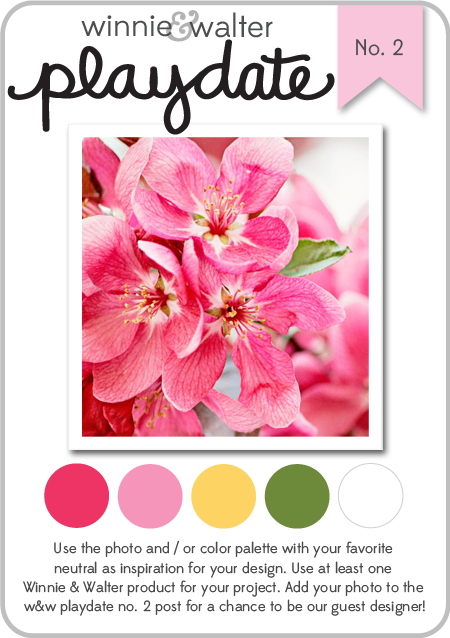
As well as the new "Color Theme" challenge over at the "The Card Concept". This is a copy of the inspiration image for the current challenge!

Oh, and speaking of Kristina and Simon Says Stamp --- this is the big CREATE Weekend being hosted out in Columbus, Ohio and oh, how I would LOVED to have been there. I did even try to look up flights, but before I even found flights to that area, the entire weekend was SOLD OUT! I do hope to try and go next year and know a few gals from online who are there now...I'm sure they are having a fabulous time and I wish I was with them. If you have not seen the latest post from SSS, check it out HERE, along with the photos of the amazing store they set up at the Hotel! WOW! WOW! WOW!!
That is it for today kids....I'm feeling pretty darn tired but had a great day and a very creative week. I hope to be back tomorrow with some new cards and then will be heading back to my LSS on Monday for "Silhouette" group. I'm super excited to get back into that group and really start using my Cameo again. I'm feeling a bit lost with the newest software update, but know once I get back to the group, I'll learn from those who have already been using it. I really LOVE my Cameo and should be using it so much more, so this will also inspire me.
See you all tomorrow --- can you believe it'll be June 1st? It sure doesn't feel like it here, with temps in the 50's and some chilly breezes. But, the good news is that it looks like it's finally going to warm up and my Monday it may be in the 80's. Probably not here directly on the coast....but at this point, I'll be very happy with some warm sunshine, so we can finally shut the heat off for the season and leave the windows open!! We have a few mild days, but it's been a very cool Spring, which generally means, we basically don't have Spring and go from Winter to Summer, which is my favorite!! WOOHOO!!